On This Page
Step 5: Test Your Integration: Process a Payment Using the REST API
In
Step 4: Test Integration using Flex Microforms
, you successfully
tokenized a payment card. You now have a transient token that can be safely passed
through your back-end system and used to make a payment. Because this transient token
represents a payment card rather than the card itself, it is safe to transmit this
information through your system, only incurring SAQ A level PCI overheads.To process
a payment using the transient token, you need to use our REST API. This method
allows you to progress and control the lifecycle state of a transaction from your
back end system.
There may be additional steps that require further consumer
and browser interactions, including fraud and Strong Customer configuration. These
configurations can be complex flows to implement, so you might consider using our
fully hosted payment page integration method. For more information, see the Secure Acceptance Hosted Checkout Quick Start
Guide.
To process a payment using the transient token created in
the previous step, use the standard ‘process payment’ REST message and replace the
card details with the transient token JWT. For example:
{
      "clientReferenceInformation": {
      "code": "TC50171_3"
   },
      "processingInformation": {
      "commerceIndicator": "internet"
   },
      "orderInformation": {
         "amountDetails": {
            "totalAmount": "22",
            "currency": "GBP"
         },
         "billTo": {
            "firstName": "John",
            "lastName": "Doe"
         }
      },
      "tokenInformation": {
         "transientTokenJwt": ""
      }
   }
You can also test this in the live console using the credentials you created in
Step 3: Create Flex Micorofm API Keys
and the token you generated in
Step 4: Test Integration using Flex Microforms
.An introduction to
the request builder is available here.
To demonstrate use of this
tool, we will perform a simple sale transaction using the POST method on the
/payments endpoint.
- Open the Process a Payment page in the request builder.
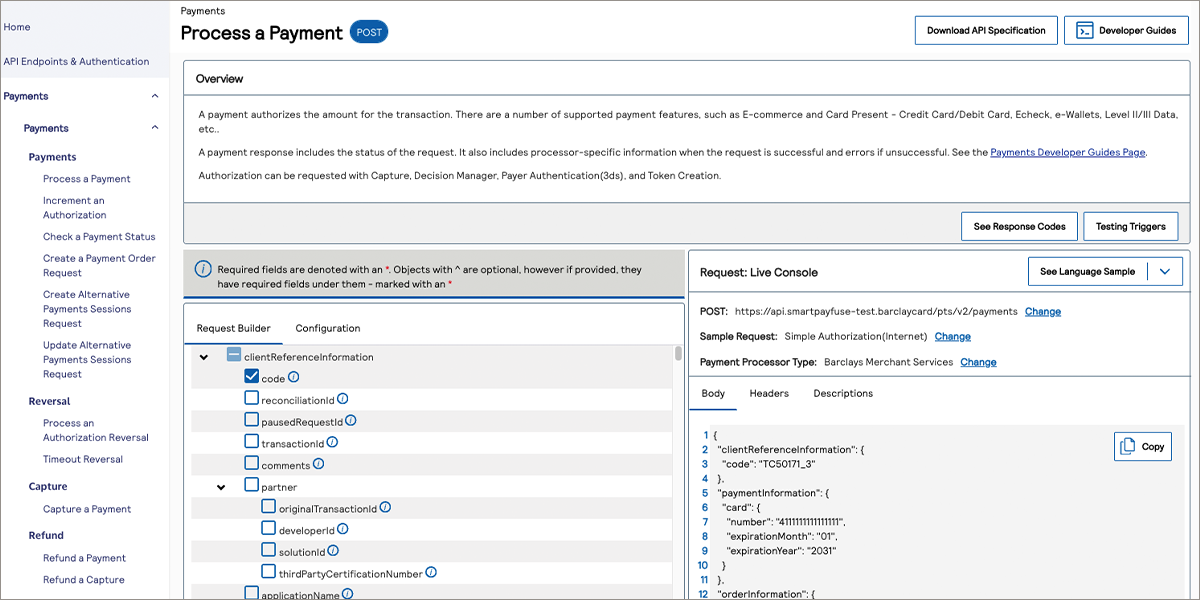
- Click theConfiguretab at the top of the REST API Reference to configure the transaction you want to process:
ADDITIONAL INFORMATION
- URL: The target API URL. This is the destination endpoint of any API requests generated by the request builder.
- Sample Request: The request type. This triggers the request builder to populate the request with appropriate fields.
- Payment Processor Type: The Payment Processor. Select Barclays Merchant Services.
In this example we will be performing a simple authorization of the card that you tokenised using the Microform; the card that is now represented by your “transient token” JWT.See the example below for the simple authentication transaction we will run in this example: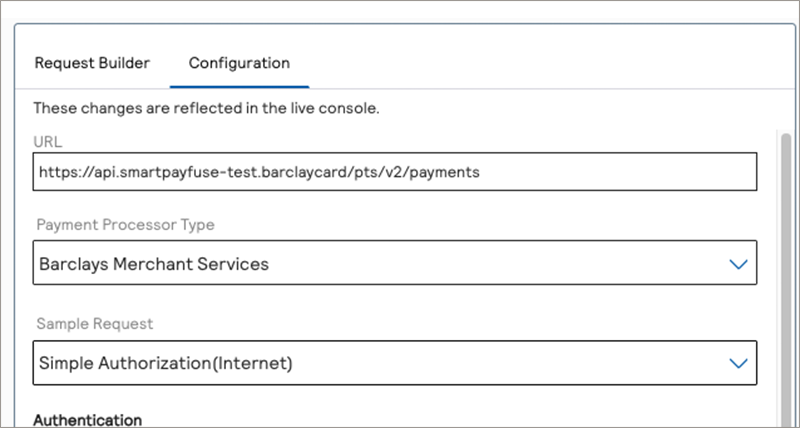
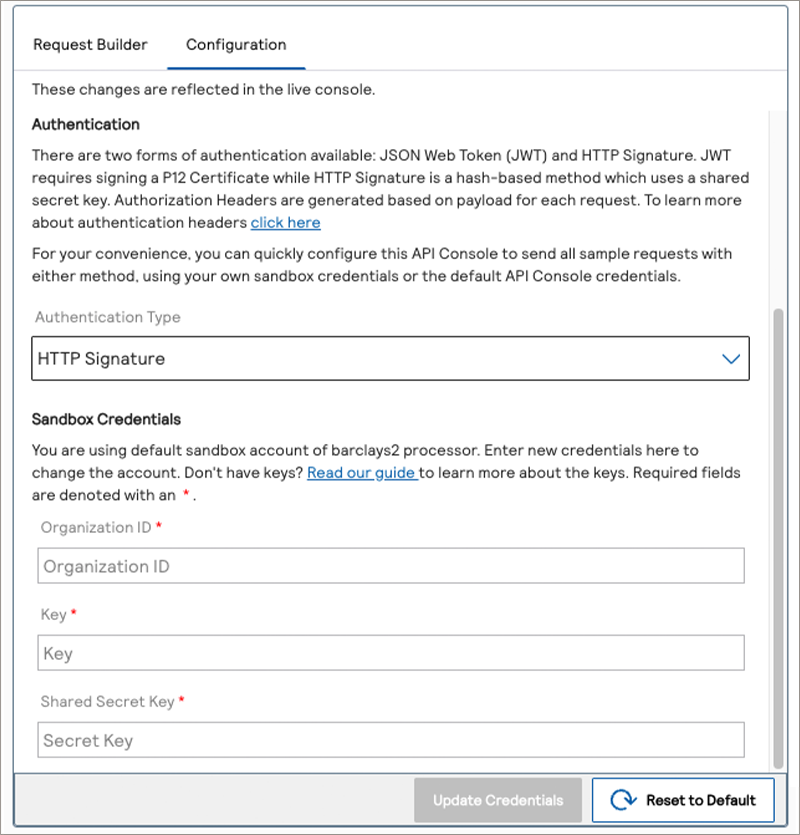
- Continue on to configure API credentials by scrolling further down in the “Configuration” tab to the Authentication section.
ADDITIONAL INFORMATION
Enter the credentials required to authenticate any request to Smartpay Fuse. Complete the below fields:- Merchant ID: Enter the Merchant ID generated during your account creation.
- Key: Enter the REST API Key ID you created inStep 3: Create Flex Micorofm API Keys
- Shared Secret Key: Enter the REST API Secret you created inStep 3: Create Flex Micorofm API Keys
- Because the standard live console test is set-up to process a card number, you will need to modify the JSON payload in the “Request: Live Console” window. See the example below:
ADDITIONAL INFORMATION
{ "clientReferenceInformation": { "code": "TC50171_3" }, "orderInformation": { "amountDetails": { "totalAmount": "102.21", "currency": "GBP" }, "billTo": { "firstName": "John", "lastName": "Doe", "address1": "1 Wokes Street", "locality": "Fleet", "postalCode": "GU51 WKS", "country": "GB", "email": "[email protected]", "phoneNumber": "4158880000" } }, "tokenInformation": { "transientTokenJwt": "THE JWT RETURNED FROM YOUR MICROFORM INTERACTIONT" } } - Click on theSendbutton to send the request to Smartpay Fuse.
ADDITIONAL INFORMATION
The live console takes care of the message digests, the required HTTP headers and message signatures allowing you to test transactions without coding the exchange in an application. See the below figure for a successful response. An unsuccessful response may occur if you did not enter a valid card expiration date or if you used different test data than those provided in the sandbox testing guide.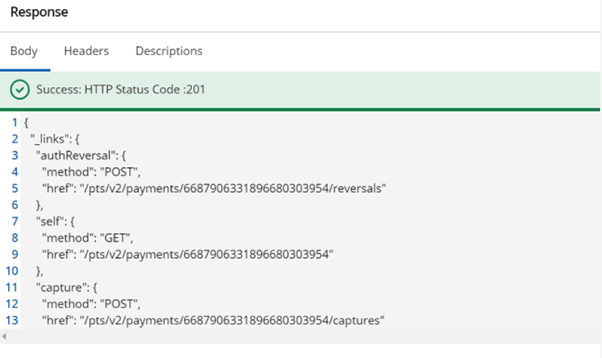
- Log in to the Smartpay Fuse Platform and check that the transaction ran in the Transaction Management view:
ADDITIONAL INFORMATION

RESULT
Congratulations, you have processed a transaction using a Flex Microform test
application and the REST API through the online request builder.
For additional
resources and guidance with integration, see the Further Information
section.